Showing posts with label fabrication. Show all posts

Monday, March 9, 2015

A Little Jewelry Education

When I'm exhibiing my jewelry at festivals, I tend to get a lot of questions about how the jewelry is made. So though I usually don't share Works In Progress, I snapped some quick iPhone photos while I was working on one of  my most recent designs.

Essentially, what I do is take raw metal materials - sheet, wire, and tubing - and "fabricate" them into jewelry:

Sheet:


Wire:


It comes in square shape already, but I hammer in every line of that texture.

Tubing:


The tubing, as you can see, comes in various diameters. I buy 12" tubes and then hand-cut the smaller tube sizes I need from that. 

So that's the raw materials. But how do they become a finished piece of jewelry? 

For me, since I design primarly with gems, the sort of "prequel" to beginning to make a piece of jewelry is pulling stones from my stash, comparing colors and shapes until I'm happy with what's in my hands.

After choosing gems, what happens first is a sketch. Well...sometimes. My sketches are mostly rough ideas to build upon, not detailed jewelry renderings. I've found that I'm more comfortable working in the metal itself, rather than making a sketch and transferring that idea to metal. But for more complex designs, like the one I'm using to illustrate today's post, sketching does help to gauge "what's going to go where", and "Do I really want a 3 inch doodad which might not be structurally sound, or would it work better at 1.5 inches?". It's helpful to answer these questions sooner, rather than later. :)

Once (if) the sketching is done, it's time to make bezels and back plates for the gems. I can't solder anything together until the gems have their metal homes first. I detailed the process of bezeling and back plate-ing here if you want to read more about that. Once that part is done, I start shaping and refining the embellisments.*

*Anything that's additional to the basic metal fabrication is commonly called embellishments. I could simply set the gems in a bezel and add a bail, and that would be an un-embellished pendant. Most metalsmiths, however, like to play. So we add all manner of layers and doodads and geegaws and granules...those are the embellishments.  :)


In the above photo, there are no backs to the bezels around the gems, and the embellishments have not been soldered in place. This is the beginning of desiging. I cut and shape the wire embellishements and start laying them out on the tape until they look right. 

I shape freehand, working along a somewhat meandering path to what appeals to my eye. I like what I call balanced asymmetry. For this design, that means that the two triangular bezels in the upper corners of the necklace are close, but not quite the same distance from the center bezel, and that the triangles are not both facing the same direction (one is point up; the other, point down). 


Now the wires are soldered, and two of the hinges are done. The necklace is taped to a neckform for me to check how it will lay on the body. 


Above (in this terribly blurry phone shot) are the small tubes I have cut from the 12" length to make the hinge joins. And the jump rings (which I also make by hand): 


that join the hinges together, as seen below:


In the above photo, you can see one of the "arms" of the handmade chain on this design. 


These are some of the arms. They're soldered together, and the tiny tubing is attached, but they're not added to the body of the design yet. But they're going to go up the neck, on the sides of the centerpiece, and lead to some additional handmade chain in the back. 

And *that* extra chain is all hand fabbed too. I take a slightly thinner wire and make ovals out of it, by first coiling it on a mandrel. With round wire you can just coil to your heart's content, but square wire can very easily get "off the square" and twist where you don't want it to. So it's a little slower process to carefully coil square wire:


Then the rings get sawn off, one by one, I've sawn a bunch loose already:


Loose rings sawn from the coil:


Next the open ends will be soldered, and then they'll be textured:


The one on the left has been textured; the ones on the right are soldered but not yet textured.

They then get soldered together, with another jump ring, to form this:


at the back of the necklace. 

Here's a process shot of those loose arms, all soldered together and getting their tiny ball embellishments:


Painter's tape, as you can see, is an invaluable tool in the jewelry studio. I use it constantly to temporarly keep things in place before they're physically joined. 

And now the whole neckpiece is done. Well... done with the fabrication and soldering, that is. Which doesn't mean that it's *finished*. There's a whole lot of clean up to do, which will remove any excess solder that went where I didn't want it to go, and then several steps of polishing the metal to get that soul-satisfying, deep shine. And then the gems need to be set. Probably at least a day's work (if not more) still...so no full-on shots yet...but I promise to show you once it's ready for viewing. :) 

Wednesday, November 13, 2013

Big Changes, Big Rewards

I feel like I've spent the better part of this year moving toward the big picture. Not known for my ability to strategize (but if you want someone detail oriented, I'm your girl!), I spent the first several months of 2013 focusing on honing my making skills. Lots of time spent at the work table, with the torch, joining things together.

And in April, all that work sort of metamorphosed into a collection. Not that it was really a collection at the time....more like seven pieces of jewelry that had, at least, a cohesiveness (something my designs have been sorely lacking since I began fabricating). And they sold...not like crazy - I don't know if any handmade art jewelry sells like crazy in this economy or environment - but I sold several at my first three festivals of the year. A month later, I had two other festivals. And I sold several there. And so on, all year long. I sold several online, too. They seemed to be well-received everywhere I displayed them.

So I continued to refine, practice, design, create - in this same vein. But the whole time, I'd been making one piece. Soldering it. Making another. Soldering it. (ad nauseum). Which was fine...until I enlisted my husband's help in rearranging my studio recently (big project, still not done, but some major changes were made).  And WOW, what a difference! Last week, I made earrings. Twelve gemstone settings (six pairs). In the same painful (I now realize) manner as before.

This week, I made ten pendants. In a quite less painful manner. And I am amazed at what happened!


Having the space to design them all together made them sort of blossom. They got more complex. They got more showy. They really started to take on a life of their own...I'm thrilled. And it's funny, since I batch nearly everything I can (soldering, cleanup, polishing), that I didn't think to batch my designing...or maybe I just haven't had the time, in addtion to not having set up the space to do it. I'm so thrilled with the results! These creations started out as some very simple metal embellishments to accent my ever-constant love of beautiful gems. And now they still do that, but they're so much more than just the second fiddle to the colored stones. They're part of a more "whole" design scenario:


Looking at them all as more of a whole than as one design, another design, then another design...has really helped me focus on what I'm doing with EACH design. And designing them as series-es, which I plan to do even more going forward, has influenced how each design turns out. Some have more "choppy" or spiky ends on the textured parts, some have more loops, some have more curves and waves and circles. In this series there was only one (2nd up from bottom, center) that had spiky embellishments. The rest are quite wavy and flowing.

AND, because the metalwork has started to come into its own, per se, I am thinking about my gem buying  plans for next year. I had shied away from larger stones, buying in a certain size (which means, usually, a certain price point) to keep costs down. And I'm still concerned about that, of course, but now I'm feeling (again, I know I've mentioned this before) like I want to go bigger and bolder with the gem size and the metal design.

I think a few things have contributed to this:

1. The Sedona Arts Festival. Just over a year ago, I was in Sedona, not selling a whole lot, and hearing, "I wish it was a little bigger", fairly regularly. And the jewelry the women were wearing! Bold. Color. Heavy silver. Gorgeous! I vowed then to go larger. But I sort of chickened out on my next buying trip...it's easier to say you're going to do something, but without an established way to do it...harder to follow through.

2. The Ruidoso Arts Festival. This past July, I went to Ruidoso, NM. And tanked. I've posted about it...lots of women from Texas. Who kept wanting things bigger and blingy-er. I'm not jumping into bling, but bigger color and stone size? I can do that. And the jewelry they were wearing! (see a theme, here?). Sometimes I think I've lived in the Southeast for too long, where the women tend to like small. Dainty. Pretty. Not-statement-y. But I grew up in the West and I LOVE bold. So why not design bold?

3. My own confidence in my skills. The first year I showed any fabricated jewelry at festivals, I told people I was a "baby metalsmith". I was a beginner...totally unsure of myself. Didn't want any custom orders (which of course, didn't mean I didn't take them...a girl's gotta push herself). Felt like an impostor. Oh, it was UGLY. I hadn't set any stones at that point (well, outside of classes. Nothing I would dare to sell). I was lost and looking for myself but I wasn't ready.

This year, the payoff for persisting has been HUGE. I've been practicing nonstop for the last two years and things I used to struggle with are now coming much more easily, which frees up my concentration for designing, rather than being so intensely focused on the physicality of making. And *that's* the happiest place to be.  :)


Tuesday, October 29, 2013

Fabrication Details

I have had some questions about how I make the embellished gemstone designs, and I thought I'd share a little more about that process. I've shown you the steps to making a rimless bezel setting, here, but now I'll show you what happens once the bezel and back plate are soldered together.

Mostly I sketch a rough idea first, though a select few of these pieces actually come together all at once at the work table. The rough idea may or may not end up being part (or no part) of the final piece. I am a bit of a "punter" with this kind of work; I use estimates and guesses and fiddle around until things look good to my eye. I hate to measure, so unless I'm making earrings I don't measure anything.  :)

I start out with the bezel on a piece of painter's tape, and then I add in the pre-shaped pieces until I have a design I like:


The design laid out the way I want it. Nothing is soldered in place yet, they're all just loosely resting on the tape. At this point I will often snap a photo with my cell phone so I can reference the placement of the embellishments if necessary.


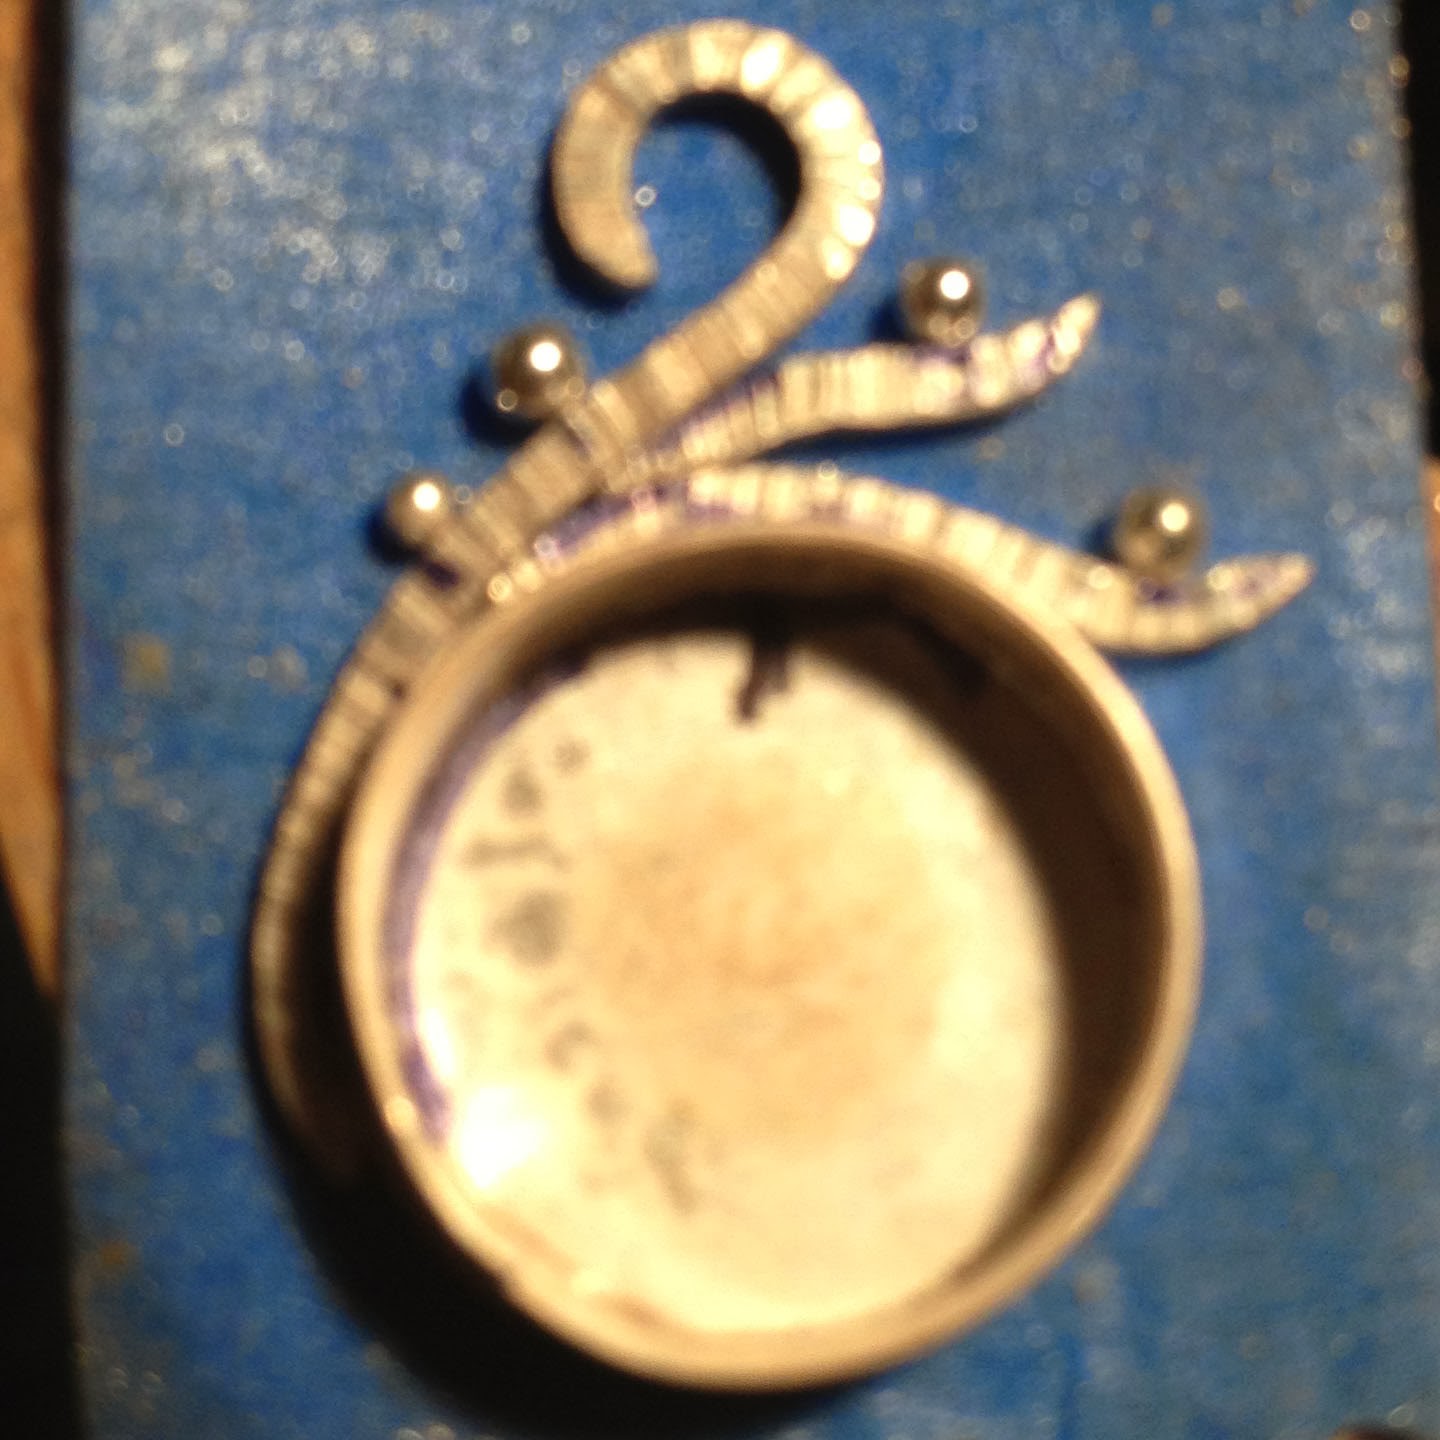
Sorry for the blurry-ness of these quick snaps. But you get the gist, I hope. Anyhoo, the only thing different above is that I've marked up several areas with a Sharpie. Kind of hard to see but the blue spots (including the blue areas inside the bezel itself - mostly running down along the left side of the pendant (your left as you look at the photo) are guidelines for where I"ll place the solder. Otherwise once I remove the separate pieces I will have no clue where exactly the solder should go.


Wire embellishments have been soldered in place. If you look closely at the lower level "wing" on the right side of the photo, you'll see that some solder ended up on top of my texture. That will have to be removed in the cleanup process.


Balls are now also soldered in place. This is typically a pretty happy moment so I put in a smiley face. The only thing left is to solder the bail, and then I can move on to the clean up process.


I actually got excited about making this design and forgot to do a stone check once I'd soldered down the bezel, so I did it after the extras have been added. Fortunately it still fits! The dental floss is there to remove the stone, otherwise I'd have no easy way to get it back out and it's nowhere near ready to be set yet.


Bail's on! I cut a piece of tubing and soldered it on to the pendant. The chain will run through the bail and out the other side so the pendant slides freely.

Next is the cleanup process and then finally the stone can be set:


Voila! Now you know a little more about how the magic happens.  :)

Wednesday, October 16, 2013

I Am So Close to a (Somewhat) Regular Schedule

..and I can't stand it. Today I am really *not* wanting to work...I mean, I DO want to work, but my body is tired and my energy is low. But I'm in the same situation I've been in all year - too busy to stop, too busy to address anything but sitting-at-the-work-table-and-fabricating, too busy to catch my breath.

Once the Memphis festival is over next week, I have two months (or most of two months) to work my schedule and take my time designing, working toward a larger goal than "in ten days I have another festival". I am really, really ready for it. I have had several things click into place, or at least start to, in the last few months, but no time to fully develop or work on my grander plans.

I'm not the patient type, as anyone who knows me will tell you. So I'm waiting, gritting my teeth, trying to calm my mind from all the things I'm thinking about and trying to focus on the necessity. Which is having more inventory to sell:

ohisthisnotatonoffuneyecandy?

I've been trying to slowly step back into wholesale, but growing a wholesale business takes time (lots of time) and a product range that I simply don't have yet. I've designed several new rings, just recently, and I think they'd be great wholesale items. But I can't make the mosaic ones fast enough, and I have NO MORE STONES that will work for the pop rocks rings...it's sort of a problem, no? So wholesale plans are a bit stymied right now.

Also I am wanting to really stretch the mosaic designs to their fullest, and those are so time-consuming that I can barely keep three or so in stock at festivals. At Nashville, a woman randomly said to me, "Well, you must have had a good show!" I asked her why and she said, "Your booth looks a little sparse". Um...it always looks like that! At least this year it has. I actually had as much inventory out as usual, but absolutely no back stock to fill in with. 

So it's back to the making. Which I do love. But maybe notsomuch when I HAVE to make it every day. My shoulders don't love it that much. Or my wrists...one more big push for Memphis and then I can regroup, refocus, and (maybe) even relax, a little...


Thursday, September 12, 2013

Higher, Faster, Stronger. The Best Never Rest. Etc.

Though I struggle against it, I am a perfectionist. It's in my bones, in my DNA. I want the best, I want to *be* the best, I want to be able to...be stronger, fly higher, design and fabricate (and do everything else) faster. It's a driving force in my life but also a constant source of dissatisfaction.

And my own designs are certainly not off limits from my expectations, of course. Usually when I'm designing one of the labor-intensive, fabricated pieces, it's (mostly) a labor of love. Sometimes it's just a labor. And the last time I did one of these, when yet ANOTHER part of the process utterly didn't work, I cried - just a little - and yelled some unrepeatable words. And I do mean yelled. At the top of my lungs. Twice. (the first time just wasn't satisfying enough).

Then I stepped away from the work table. I had a snack. I poked around on the computer. For about twenty minutes. Then I made myself go back to the work table, pick up the torch, and begin again. Some days, that's what it's all about - refusing to give up. Of course, some days I should give up, but this was not one of those days. How do I know the difference? Trial and error. :)

What was frustrating me was not learning something new, but rather running into an issue(s) with tasks I've done before. A lot before. So much so that I should be able to pretty much do them with ease. And most days I do...but not earlier this week. Monday's work was an exercise in picking one's self up after being dropped in the dirt repeatedly. Bloody, but unbowed, and all that.

So what did perseverance get me? Well...


This. Which isn't a bad reward. It's better when you don't start thinking that the reward  might never happen...because this nearly went in the scrap jar more than once. But it's completed and all is good.  :)

It's slightly different from this piece in a few ways:

- I made the overall pendant more lightweight, using a lighter back plate. The other one was comfortable to wear, but rather heavy. By the time I'd finished the three plaques, and the chain, all that metal added up. I wanted to design a bit lighter this time. Less silver = less cost. Metals prices still aren't super inexpensive, and keeping costs down is always a bonus.

- I  also learned from this chain:


to go bigger, bigger, bigger on handmade chain loops. The chain above was nearly the death of me, both the making of and the cleanup / polishing. First, I don't love soldering small jump rings. These are about 3.5 mm
18 gauge rings. And there are a LOT of them. And my soldering didn't get noticeably better after having done so many. And then hand polishing them all...I did not want to repeat that anytime soon. So I made much bigger, wider links on the new necklace. Result? A happier Jill. Also, less labor because I made 300% fewer jump rings.  :)

- I also wanted to try a different connection method. Past big necklaces like these have had a simple jump ring connection, which has worked fine. But I want to push myself a bit on connectors and bails. I think it's time. So I soldered on some tubing and then ran a jump ring through it, for a more flexible connection. I am planning to use this kind of connection on some other pieces, and wanted to see how easy it would (or wouldn't) be.

And in the meantime, I finished these:


Two of the Royston turquoise stones I purchased in February. The bottom pendant had to be completely redone, because of this:


The bezel kept getting these nicks, or divots, in the top. This has happened before and I couldn't figure out why...I got some online help and now I think I know what was happening. But I had to scrap the bezel and back, saw off the top embellishments, and start again. And of course the top piece(s) didn't just want to magically attach to the new bezel...it took far longer to re-do than it should. I'd almost given up on it entirely.

But I didn't. I cried and I yelled and I might have even stomped my feet a little bit...but eventually the studio diva got her way. At least I can exert my will over the inanimate objects...sometimes. :)

So a lot of imperfection manged to add up to more learning...and at least a *little* satisfaction in the end. Worth the journey, every time.  :)

Sunday, September 1, 2013

The Best Laid Plans...

Oh positive thoughts, if only you were able to manifest so easily!

In my last post, I was SO excited to have a week in the studio. I should have known better. Just when I think I'll get a handle on things, some sort of monkey wrench gets tossed in and the whole plan falls apart.

I won't bore you with the details. I'll just say that my output last week was so much less than I'd planned or hoped for. But at least there was some output. Here's the evidence:


Crescendo necklace and earrings, turquoise


Yes, at least some of the twenty-odd bezels I made last week got all the way through the stone setting process. And I love the way they turned out. The pendant gave me fits at first, but I'm so pleased with the end result. I love the contrast between light and dark in these stones, and wanted the embellishments to reflect that. The earrings don't have room for as much embellishment, of course, but they echo the movement and upward curvings of wire on the necklace.

And then, this:


A lovely Deschutes jasper from Oregon. Deschutes is not easy to come by (nor inexpensive), since the "dig site" is no longer active. I've had this stone for a while, and decided to give it a proper setting. And I like it so much that I may have to go hunting for a few more Deschutes cabs when I'm in Tucson next year...

I don't buy a lot of round stone cuts, because I think they're sort of boring. But this was more about the patterns of the stone, rather than the shape. And of course I wanted to contrast the smoothness of the stone with some pointy asymmetrical embellishments. It's also a bigger stone - and bigger embellishments - than I normally use. But I'm thrilled with the result.

Also, the next mosaic piece is on the way...most of the mosaics are soldered on and it's probably two-thirds of the way finished. Not including making the chain...I love the handmade chains when they're finished, but I don't love the actual process of constructing them. And I'm trying to do something a little different with the connections this time...I'll show you all of it once that baby's done.  :) 

Friday, August 23, 2013

Whirlwind Summer

It's the middle (actually a bit past that) of August and my summer is nearly over...and I don't have much to show for it. I was trying to figure out why I'm feeling behind on both work and personal things, and when I look back at the last three months, I actually had a total of 22 days that I worked (or partially worked) in the studio. 22 days out of a potential 55 (looking at June, July, and August).

Um...that's not a lot. It's also not enough.

Why so few working days? Here's a brief synopsis of what took up the rest of my time:

Festival, Festival/travel, Travel, Family Visit, Travel, Festival/Travel, Travel, Family Visit.

The in-between days were working days (I try to not work weekends, but with a schedule like that, I did work part of some), but not all in between days were work-able. Even a local festival usually requires a recovery day. Travel festivals require (sometimes, like my big drive to NM and back) a bit more than that. I had two travel festivals in that time frame (NM was a huge time suck), plus two family visits. My sister- and brother-in-law stayed with us for seven days. My mother was just here for six. Do you know how difficult it is to work FROM HOME when people are staying in your home?? Trust me on this. Visits are nice, but they're not...productive.

And then there was some personal travel thrown in too - four days in Arizona, for my father's memorial service / family time. Five days in San Francisco with my husband  (gotta get a vacation in somewhere!). A long weekend to Charleston for a bachelorette party.

What it all adds up to is my being behind...again. Or maybe I never really caught up. Fabricating designs from scratch requires a pretty long lead time. Design time can't really be rushed; it's like the customers *know* which designs you didn't put your heart and soul into...and they won't buy those.

Once the fabrication work is done, cleanup also takes a lot of time. Stone setting takes time. And it's all very physical labor, so I can't just hit it hard for three days in a row or my body will rebel. So there needs to be time, and kind of spaced out time, to create. Not to mention the whole rhythm of creating, which takes a little bit to get into and out of...every bit of travel or family visits disrupts that, and sometimes it's very hard to get back in the mindset.

So I am going to have to restructure for next year. I'm hoping to restructure for THIS year, but I'm already behind and suspect that it won't change too much in the last four months of 2013...I *am* looking at a potentially slower October and November, but things always come up - especially later into the holiday season. Last minute orders, short-window custom orders, weird things that happen...it's not typically a good quiet time for a retail jewelry business.

So next year is going to involve more planning. Some of that I won't be able to control, because of the show deadlines, the potential for acceptance / rejection, the physical ability I'm only in charge of part of the planning...and I have to account for the Fibromyalgia, which takes a wicked delight in being consistently inconsistent.

And yeah, I said "I can't hit it hard for three days in a row" but that's what I've been doing. And that means pain. Fibromyalgia flare ups. More delays because I push and push my body and it eventually pushes back...hard. However, necessity is the mother of...ah, screw that. Necessity is the mother of overworking. ~wry smile~

So here's what I did with my last two days of "hittin' it hard" before leaving town again:


Mmm-hmm. Bezels. And backs (which are all hammer textured, then the bezels are soldered to the backing, then the excess backing is filed away...*then* I get to start working on the embellishments. So for this week (two days of work!) I have 40 stones bezeled, and 21 of those have soldered backs, ready for the next step. It's all I could manage, and I suspect my left arm (hell, left side) is going to be complaining for the next two days or so...but the work has to get done sometime!

It's quite gratifying that the colorful stone pieces are steadily selling. Which is nice. I love to "have" to buy replacement stones.  :)  But I have to watch myself - I tend to get lost in making these and over-achieve, as it were. I'm actually supposed to be working on some new mosaic pieces. And there IS one in progress, and several sketches waiting, but I wasn't ready to tackle soldering on mosaics this week. They're finicky. They take a lot of patience to get them lined up right. And they drop on the floor - usually just when I've found the mostexactlyright piece - and are never found again. So I did bezels and backs instead.  :)

Next week I have a WHOLE week in the studio...can't wait!! And it will include working on some other artist-y pieces. Deadlines are quickly approaching and fall is on its way! Stay tuned...

Wednesday, August 14, 2013

Gratifying Results (the Obstacles Are the Path).

That post I wrote last week on pushing myself and learning new tricks? I didn't have the pieces I made quite finished when I wrote it. But they are now...so I'd like to show them to you.   :)

The first piece, that gave me SO much grief, is this one:


It's wide, nearly an inch wide, and thick gauge sterling. And I shaped and soldered those swirls...or THOUGHT I'd soldered them...but they kept. falling. off.

Now, I have struggled with soldering "not taking" before...primarily with joining two items side by side, which is why I made quite a few of these designs:


because all the pieces on the top get soldered side to side. So now I'm fairly proficient at that.  :)  Struggling with something? Try making fifty pieces that use the technique you're struggling with. That'll make you improve.  :) 

So. Usually soldering something on top of something else is not a problem. But...joining on a curved surface is *so* not the same as joining on a flat surface...I forgot one of the Basic Rules of Fabrication:

You Need A Good Join. Solder Will Not Flow to Fill A Gap.

(Actually, solder *will* flow to fill a gap...but a very small gap). In the case of this ring, I wasn't getting very good joins. Chalk it up to impatience, inexperience, just generally being clueless that day, but for some reason I thought that if I just had *part* of the swirls touching the ring base, the solder would take care of the rest. I'd sort of "tack" down the swirls and then go back and hit the parts that hadn't soldered.

FAIL.

What ultimately had to happen was that I went back and re-shaped the swirls (which took more time, but it would have been less time overall if I hadn't done it wrong to begin with) so that all parts of them laid flat on the curved surface. It wasn't easy. And now I can see why some handmade rings are made...well, let's say differently.  :)

The other piece I made, which also presented a challenge, was this ring:


I've been wanting to make rings with the mosaic designs for a while, but soldering all those pieces onto a curved surface isn't easy either! But it's not all about easy in the studio; otherwise everyone would be doing it.  :)   I helped myself a little by Euro-square-ing the ring base before starting to solder the embellishments on top of it:


This ring mandrel is squared, as the photo shows. Most ring mandrels are round, but sometimes, especially with a wider band, a squared ring shape will be more comfortable on the finger. Also, if you're making a ring with a heavy top or a big stone set on top, a square shape will help keep the top of the ring upright, rather than the shank sliding around the finger. 

So I squared the mosaic ring. Which at least gave me a partially flat surface to solder the silver pieces on to. Though they're not quite ALL on the square part...since I did three "stations" of mosaics, each station drifts off to the side a bit. But the overall ring is balanced.  :)


AND comfortable. Always important in jewelry design.   :)

Monday, July 15, 2013

Hi Torch, I Missed You!!

Okay, I'm a geek. I love what I do. I didn't really miss it while I was gone, but I was sad to leave the work table and I'm glad to be back, though today started out a bit slow (and late! Good thing Brett is working late tonight...so am I).

San Francisco was fabulous. Though cold. And it made me yearn to move West (again...I know. Broken record). But the trip was a really good break, and though I'm struggling a little with getting back into a rhythm, I did manage to finish up some designs I started before the trip:

 
Morenci turquoise, from Arizona. It had a little issue with one of the balls not staying put. But now it's all set. I love the color of this turquoise - pure, unadulterated blue heaven. And once again, I played with symmetry / asymmetry, stacking design elements on an asymmetrical cabochon. There's a calmness to this pendant that I really like.
 
 
Some gorgeous chrysocollas! I love the blue-green combination in these stones. I added slightly vine-y elements to echo the flowing of colors on the stone surfaces.
 
These designs have been a lot of fun, but I think I am going to step away from these pieces for a little while. I want to do some more Larimar in this style, but lately I've been itching to do more of the metal-intensive pieces. I've got some designs in my head that I can't wait to start executing. I love the color intensity of this jewelry, with the metal as accent, but I really want to explore some new work that's metal oriented...so I guess we know what I'll be working on this week! *After* I get done with a custom order, that is...so I'll keep this short and get right back to the torch. Lots of lost time to make up for.  :)


Wednesday, June 19, 2013

Pondering the Next Step

I think I'm sort at a weird place in my fabrication journey. Now that I've reached the point where the mechanics of fabrication are coming along fairly easily, I am focusing more on design. And that's a thrill!! I feel like I've got designs just rushing out of me....well, they're rushing to GET out, but I can't make them all at once; I can barely even scratch the surface of making any of them. My sketchbook is overflowing right now, but there's never enough time...

The dot-and-line pieces (I've got to think of a better name for those) are coming along nicely, though I'm thinking they may be too boring. Ha! Only a couple of weeks in and I'm over it already. Such an instant gratification girl! But I still want to give them a go at wholesale, refine the line, and see where that goes. And I keep thinking about how to do more of the curvy metal with the accent pieces as a stand alone. I'm not there yet, but it's floating around my mind, tickling me with its potential.

I also want to revisit this:


in several ways. I did two or three pieces like this last year, and they all sold. And they got brought up to me several times after they were gone. And I like the idea of them...I just couldn't get to where I was satisfied overall with the blackened parts. But I have a lot more experience - with both designing and blackening - behind me now, and I have some new ideas for this style.

And, I think I might be moving UP a bit with the mosaic work. I had some pieces cast last year, and they did allright...but not what I'd hoped for. And now I think I have some new plans for casting with the mosaic pieces in place, and also changing the hand fabricated work with these pieces.

I also recently finished this:


And while it was a big learning experience, I am really happy with the end result. I want to pursue this direction further, and though I know I'm crazy for even thinking about it, I am tempted to submit it here. This is such a big deal to me that I barely can think about it, much less think about winning anything...but still. You can't win if you don't play, right?  :)

Right now I'm working on a bunch more dot-and-line bezel pieces, and then I need to do some work to be cast, but I also want to start the next mosaic piece. I find that they don't make me quite as crazy if I sort of space them out a bit, and let myself play with slightly less complex pieces in between. :)

Saturday, May 25, 2013

A Grander Plan: Designing a Series

I've been working on honing not just my technical skills, but my design skill as well. And this month, I took on a design series. Instead of designing one or two pieces that complemented each other, I designed...twenty-four.

That is a LOT OF METALWORKING! I am tired. My body aches. B-u-t I have twenty-four stone-set pieces that complement one another. 

I did make it a little easy on myself because I had bought a good quality of  Red Creek Jasper stones this winter, and they usually can be a little mix-and-match-y to begin with. And I was playing around with a new design feature, which transferred well among the stones. I'd started sampling it with single-color stones, and I liked it...but it's subtle, and I felt like it needed some more vibrant stones to accentuate.

So I sorted my stones into groups with similar patterns:

 
I made the bezels, textured the backs (the back of each piece in each grouping has the same texture), and then the fun started. I played around with wire, tiny silver discs, even tinier silver balls, and jump ring placement (for attaching ear wires and neck chains), until I had the designs worked out. Then I moved on to the next series:

And repeated the process. Different back texture, but assorted dots and lines and discs on the top and sides.

And once more:


Voila! Several groupings of mix and match designs. Any pendant could go with any earrings in the series.

I really enjoyed working on these, and I also managed (a twofer!) to refine my skill in joining pieces of metal together like this. I've been able to solder a join on a single piece of metal easily, and I can sweat solder pretty well, but I've struggled with this kind of work for a while. And since nearly every piece (the curved wire, the discs, the balls, and the jump rings) all have to be "side-soldered", for lack of a better term, I think I've improved my abilities just a wee bit. Which was actually part of the plan to begin with.  :)

Now that these are finished, priced, and listed on line, next week I'm going to be working on some more "Capital A" Artisan pieces. Can't wait!

Wednesday, February 20, 2013

The Path is Never Straight


I keep saying that I want to challenge myself. And boy...I am challenged. I've been working on fabricating the most complex piece of jewelry I've ever done, and for quite a while, it hated me as much as I hated it. We were not in love at all.

It started a bit like this piece:


But that's part of the problem: it started like the piece in the photo above. Part of the way through, the design turned into something very different, which can sometimes cause difficulties. In this case, I'd already gotten to a point where I was using easy solder. And then I made some changes and found myself a little stuck.

Next it looked like this:


See, when you're soldering silver, you have essentially three choices: hard, medium, and easy solder. (there's an extra-easy, but most people I know never use it).

Essentially all solder flows (becomes liquid) at a lower temperature than sterling silver. Each solder has a bit more alloy in it, and thus flows at a lower temperature rate:

Easy solder: flows at 1325 degrees Fahrenheit
Medium solder: flows at 1360 degrees Fahrenheit

Hard solder: flows at 1450 degrees Fahrenheit
Sterling Silver: flows at 1640 degrees Fahrenheit

Since each solder will melt / flow at a lower temperature than the silver itself, ideally this means you should always be able to flow your solder before you melt your silver! AND it also means that you have three options for complex projects. You start with hard solder, then as you keep adding embellishements or additional joins, you switch to medium, and finally easy. Thus the next step has solder flowing at a lower temperature so you (supposedly) don't unjoin what you already soldered.

Sounds...sound, right?  :)  And it is. The difficulty lies in changing your design, and having already gone up the chain to easy solder for some joins...then when you have to join something else to your piece, you run a very high risk of re-flowing your prior join. And that happened to me several times on this piece. Very, very frustrating!

But it's part of the learning process. And I learned, learned, learned. I did several new things on this piece:

- Soldered big, flat pieces to a the big, wide bar (lots and lots of heat!).

- Soldered tubing to the edges of square wire for the chain (can't let them get crooked; tubing likes to roll around). Tubing and I really don't get along (yet). It tends to have a mind of its own.

- Cut out a matching top from sheet metal for the bottom of my piece (had I planned this initally, it would have been a lot easier to match). But I really, really like the effect:

- Hand set an apatite...when I got to the stone-setting step, I realized that for this design, I'd chosen an apatite. Pretty blue stone, yes, but a 5 on the Mohs scale, and also prone to fracture. So I held my breath all the way through the stone setting proces...but it didn't crack or chip. Hurrah! 


...and this bad boy is ALL hand fabricated. The pendant, the bar chain, the extender, the clasp.  While there are some parts I would do much differently, I am now starting to fall in love with it again...


 Plus, I think I'm starting to get a handle on the finishing / polishing, so I can get the look(s) I want for the metal. You'd have to be a metalsmith to understand how important that is to us geeks...just trust me on this one. It's a happy, happy day in the studio. :)