Showing posts with label organization. Show all posts

Monday, October 7, 2013

From Chaos to Clarity

At least, I hope that's the progression. It's funny how small, unexpected things can cause seismic shifts in your life...

A few weeks ago, I was approached at an art festival by a fellow jeweler. One of the other jewelers in our community had died, and she had taken on the task of clearing out his studio / workshop for the family. This man taught classes and had / has a very large space dedicated to jewelry design / teaching in Georgia, which is slowly being cleaned out, items sold, as they fit other jewelry designers' needs.

I went out to the space last week, and was overwhelmed by the sheer amount of STUFF in there. When you're teaching, you have to have a lot of extras in stock - pliers, scissors, rulers, etc. And I think we designers are all just naturally hoarders - we always think we can use "something" for "something" - even if we don't quite know what any of the "somethings" are just yet...by this I don't mean that the shop was hoarder-like; it was very organized. But the amount of things in there...boggle the mind.

I came home with a random assortment of goodies: visor, shelving, books, files, clamps, ionic cleaner, and the best find of all - a dapping block and punches:

Mine is nowhere as clean and shiny, nor as nicely organized as the one shown above. It's got some rust, some patina, some scars. But some sandpaper and oil will take care of the rust. And the patina and scars would happen with use, anyway. This one's already broken in.  :)
The set is American made (so it's O-L-D; nearly every jewelry tool I buy is from overseas, either Pakistan, China, or Europe. Tools like this are not U.S.-made anymore). And it has been on my list of things to add to the studio. Plus I got it for about half of what a new one would retail for. :)
The day after I'd visited that studio, I went to my jewelry supplier for some metal and to ask questions about the other things I was considering buying. And I came home with this:
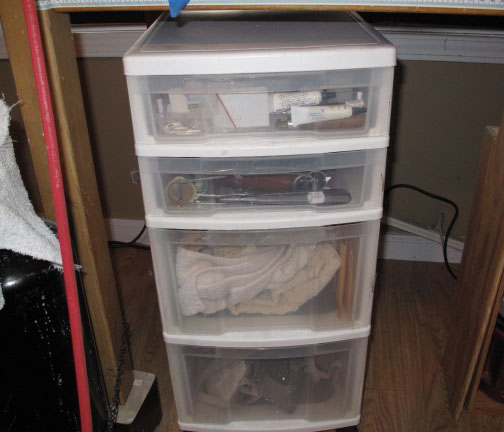
(the large version on the right). Which has NOT been on my list of things to buy...but I have had a sort of piece-meal, self-made organization system (i.e., not really working for me) system on the work table for some time now. Andthis looked like a much better solution to some of my storage / accesibility issues with tools, burs, etc. So I put some stuff into it and on it, but then realized I'd have to make some studio changes to accommodate it and also for the dapping set. Which made me realize (and it wasn't all this weekend, and overhaul's been sort of coming on for a while) that the studio needed some serious TLC and re-org-ing.

So that's where I find myself this morning:


Can you see the storage caddy? (just to the left of the trunk, in front of the drawers). Not exactly working to capacity from the floor.  :)


to the further left (not see in the photo) is my work table. I have a tiny path from the computer to the work table...so I can work on my very necessary tasks...but the rest of the studio is a little out of control...it seems like I have to make things even more chaotic and messy to arrive at a working solution! I'd hoped to be further along after this weekend but I obviously set my hopes too high.  :)

So...one dapping set and one storage caddy have brought about a whole overhaul-in-the-maknig. For want of a nail...

I'll post some more when it's further along but for today...it's jewelry making time.  :)


Friday, February 1, 2013

Studio Set Up, Part II

In my last post I showed you what wasn't working in the studio, and what I did about it. This time I'll give you a look at what HAS been working for me, and maybe it will work for you, too.  :)


This is a simple wire bin that stores hanging file folders. I use it to store my metal. Each folder is labeled (except for the front two) and each gauge (I stock from 10 gauge down to 26 gauge) and type (round, square, half round, etc) gets its own folder. The wire itself is stored in a big ziploc baggie to prevent tarnishing and also I put the most recent price I paid on the bag, so I know immediately what the cost is when I'm pricing my work.

Sheet metal is in separate bags to prevent scratching, and sits in the front pink folder. Bezel wire, in individual baggies by size, sit in the folder behind the sheet metal. And there are two folders in the back that (separately) hold sandpaper grits and templates for cutting shapes in sheet.

The bin itself is on a small rolling stand so that I can roll it under the work table when it's not needed, and roll it out when it is. It's perfect and I never have to guess which wire is what or where it goes.  :)


My stump (salvaged from when the neighborhood church had a tree-cutting bonanza!) is about nineteen inches high and gets used constantly. I stripped the bark, let it dry out for what seemed like forever, and then nailed a strip of copper around it to hold my hammers. It's not the prettiest hammering job - the copper is all wonky, but I don't really care how it looks; it's utterly functional. I just care that my main hammers (I have fourteen, but nine are in major rotation and seven of them hang on the stump) are easily accessible.


My plastic storage bin that sits under the soldering station (you can see the red line of the tank / torch hose to the left of it). This is also on casters so that I can pull it out for my needs and then push it back out of the way when I'm soldering. It holds lots of useful things like gray wheels, sanding discs, my jig cutter, solder, all the rags I use for the studio, my respirator, etc.


My white board. Oversized. The first one I had was magnetic, which was nice, but it was too small. And this one was free, so I'm not complainin'.  :)  It hangs on the wall just to the right of my computer desk, where I can glance up at it easily. And it holds a TON of information. I use it as a visual reminder of what I'm running low on, so I know what to order, things that need to get done in the coming month / year, etc. I don't know what I'd do without it.


My see-it-all wall calendar. I buy a new one of these every year, and it's incredibly helpful when planning out show schedules, personal travel, etc. The post-its have the name of the show, how many days of the show, and the deadline for applying, and they're posted on the calendar on the appropriate weekend. I can't plan my travel and festivals without it - sometimes I have to apply six months in advance for art festivals, and then I forget what I've applied for, and I don't want to plan something that conflicts with the show...so this helps me stay organized.


This is an after photo, but it only had some minor changes. One of the best things I did when I set up the studio was spend on shelving. Nearly two full walls of it, and it's all full. But what I want you to focus on is the set of white binders on the lower right of the photo. They're right above the computer for very easy access, and they have names like, "processes", "tech", "design reference", "biz info", "metal info" and so on. And the last two on the right (that I reach for more than almost anything else), hold my cabochons. :)

These binders are invaluable. If I need to know how many feet of wire in an ounce of 18 gauge, I can look it up easily. If I need to reference an older design (with notes about what gauge of metal was used, how I made the design, etc), it's all there. If I haven't done a process in a while (mostly related to paperwork or data entry), I can refresh myself on it before hosing it all up.  :)

Hopefully some of this helps some of you design (or re-design) your own studios. It was a lot of work to get it back to a useful state, but so worth it. Now I smile (instead of cringing) when I walk into it every morning!

And the jewelry's coming...I promise...stay tuned.  :)


Tuesday, January 29, 2013

Studio Set Up, Part I

I posted previously about tackling my utter disaster of a studio. Last year was a year of craziness, running around back and forth to Arizona to visit my father as much as I could. I also exhibited at a lot more festivals than usual, so I was home even less of the time. And actually, after the major jaw surgeries in 2011, I hadn't given the studio a good overhaul / organizing in nearly two years..it showed. Everything, everywhere, was just a pile of clutter. I wasn't really being as productive as I wanted, because I either:  a) couldn't find things when I wanted them, or b) couldn't get to things when I wanted them.

You know how sometimes you get smacked with the realization that YOU are your own worst enemy? As I looked around the studio, I saw myself. And it wasn't at all pretty. Or manageable. So I took some time to sort through what was working for me and what wasn't. And I made some small changes that I think will make me SO more efficient going forward. The small details are just as important as the big changes.  :)

What wasn't working:


The soldering table was the biggest mess (actually, maybe *not* the biggest, scary as that thought is). But it certainly was impeding my ability to create. It's hard to see in the photo, because of all the white flux and crap all over the table top, but there are scattered bits of sanding disks, wire, sheet, and assorted other miscellaneous detritus all over the table. I must have had eight or so little sorting dishes (I use these) that held assorted "metal to use", left over from other projects. But they never got sorted. And I didn't know which type / shape / gauge of metal was in them - they were all mixed together in each bowl - so I never wanted to go looking for what I needed. I just ended up using new metal - horribly inefficient and not exactly cost-effective.

It seems that I somehow get flux all over everything when I'm working. I just do. I'm a crazy flux-spatterer! Like Pollock, only it's all white on black background. I can live with that (it washes off pretty easily), but having all the bits of metal around was not efficient or productive. So I sorted ALL OF THEM. Tedious? Definitely. Necessary? Absolutely.

Jump rings, fancy jump rings, flattened dots, beaded wire, square wire, tubing, etc. And they all got new homes:


Each tin holds one item - say, square wire. It doesn't matter what gauge wire, but I now know where the square wire IS when I need snippets for design elements. I labeled all the tins with painter's tape and a sharpie, and they all live in the box you can (sort of) see behind them, the one with the butterfly on it. MUCH improved. Also, notice how clean the top of the work table is without all that flux splattered on it??   :)


This is an "after" shot, because the lazy susan on the right of the wooden chest of drawers used to be here:


Pretty much where the white basket is. The lazy susan holds all my mandrels for making jump rings, as well as a bunch of pliers. Which was fine when I did a lot of wire shaping and wrapping that didn't require torch work. But I found that as I spent more time at the soldering table, I needed the mandrels to be within arm's reach. It took me over a year to move them. Sometimes you just can't see the forest for all the trees in your way...

My ring mandrels (seen on the back left of the chest of drawers) were on top of the chest already, but I had my less-often-used disc cutter on the right. Now the disc cutter is in one of the drawers until it's needed. A small, but really effective change. I also moved more tools (pliers) over to the soldering table so they'd be within easy reach as well and it's really made a difference.


I've show this photo before but it bears another look. Because I spent the better part of a year just shuffling all this stuff around so that I could do what was necessary. The mess you see in the above photo made it nearly impossible to get to any one of the work tables, at any given time. I am TERRIBLE with paper filing. It ends up in "piles to file" on the floor and then I end up working in a 2' x 2' area because I can't maneuver around the studio. So I went to this:


Which makes my life so much easier. I  put the current month's paperwork on one of these four shelves, and then at the end of the month it gets filed further into the brown expandable monthly folder. I do throw monthly receipts into the basket that you saw on the floor (I know myself!) but now they'll get filed in the expandable folder too. And the basket is now sits on a shelf, not on the floor.

Don't look too closely at the paperwork *beneath* the filing area...it will go away as soon as it's all checked and verified for taxes (that's last year's paperwork).  :)

Now I'll have to take photos a few months into this year and see how well I'm still doing!  ;)